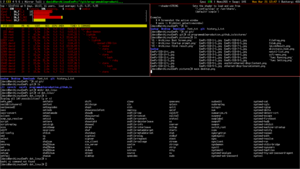
Archlinux Setup X
Now we have a base installation of Linux, however we are still missing one important component. The Windows manager. Archlinux let you choose the Windows Manager and display manager you want to install on your machine. The ones I chose are :
- Windows Manager : xmonad
- Display Manager : lightdm
The reason I chose the above is that they are enough light to run on this machine and allow to control everything using the keyboard only.
Windows Manager vs Display Manager
Before starting the installation I want to summarize my understanding about the difference between Windows Manager and the Display Manager. One of the best answer are from the following stackoverflow question
-
Display Manager A login manager is a synonym. This is the first X program run by the system if the system (not the user) is starting X and allows you to log on to the local system, or network systems.
-
Windows Manager A window manager controls the placement and decoration of windows. That is, the window border and controls are the decoration. Some of these are stand alone (WindowMaker, sawfish, fvwm, etc). Some depend on an accompanying desktop environment.
Installing xmonad
xmonad is a tilling windows manager. This mean that the windows are automatically disposed for you to maximized the most they can the desktop. All the windows disposition are control using only the keyboard without the need of the mouse. The program is written on haskell and you configure it as well using haskell.
Installation of xmonad
The installation of the windows manager xmonad has some dependency on X-windows which is basic framework for GUI in linux. We will install all of that at the same time as xmonad.
sudo pacman -S xorg xorg-xinit xmonad xmonad-contrib xterm
At this point we have xmonad install. We need to check now that it’s working as expected. To do that, we need to create a named .xinitrc in your root profile that will start xmonad.
- Create a file using vim ~/.xinitrc
- write inside exec xmonad
- save and close using *:wq”
We just that to run in the shell the command startx now. What you should see at that point is a black screen. This is not really useful. Using your keyboard type “Ctrl+Atl+Enter”, this magic command should launch for you xterm. If you are able to see that, congratulation you have install the basic of xmonad.
Personalizing xmonad
I will leave point you to that link which I used to customized xmonad. This is really useful and contain all the information you are looking for.
Installing lightdm
if you arrive here, that mean you have setup xmonad and are able not to use it running startx. We can know install and setup lightdm as a display manager service. We will install with lightdm the default gtk greeter.
The installation is as simple as installing a pacman package and enabling the service to start at boot.
sudo pacman -S lightdm lightdm-gtk-greeter
sudo systemctl enable lightdm.service
And you are done. reboot your machone and you will be able to see the following at startup now
Summary
This was quite simple and nice to get now a multi windows environment that we can control only with the keyboard. This is mile away from the ms-Windows that people know, however this minimal design make it as well less noisy and allow you to focus more on your work.
