Archlinux base installation
After years on Windows and having on the side this old Asus EeePC 11010HA collecting dust in storage I decided to give it a second life following the discovery of Arch Linux and Xmonad from a friend who is working on a startup. I’ve tried a lot of other windows and Linux distributions on this machine in the past without success, mainly relating to the video driver which is the Intel GMA500. This post summarizes how to set up Arch Linux on a laptop. I will set up this machine as a Linux development machine until I feel confident that I can do a full switch of my main PC.
Preparing the USB drive
The first setup before installing Arch Linux is to create a USB boot drive installation. As I don’t have any Linux machine for years I needed to find a way to create this USB boot drive on windows.
Download required
You will need to download two things:
- Yumi Multiboot : This will allow you to create the USB Boot drive simply. If you have chocolatey installed on your machine you can run the following command
powershell choco install yumi - Arch Linux ISO: This is the ISO image
Creating the USB Boot drive
-
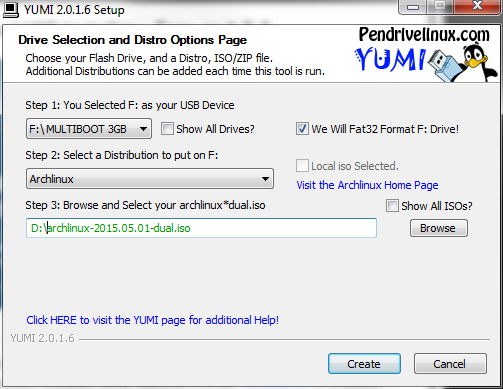
Open Yumi and set the parameters as below. Don’t forget to check “we Will Fat32 Format F: Drive! “
-
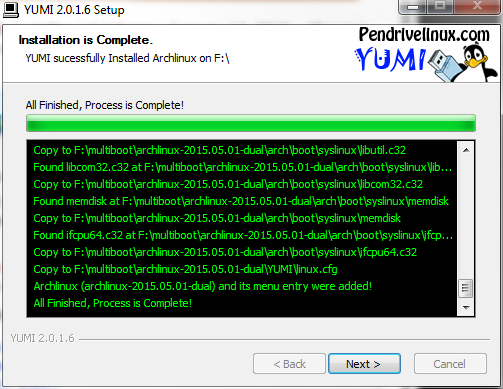
Click “Create” and wait for the creation of boot USB key
Installation of Arch Linux
The instruction below are mainly out from the youtube video that Goguda55 Tech Tutorial made. Thank you to him! I’ve added some information during the initial installation process, like installing wifi packages. These packages are useful when you are setting up a non wired computer.
Instructions
You need to boot your computer using the USB key we made above.
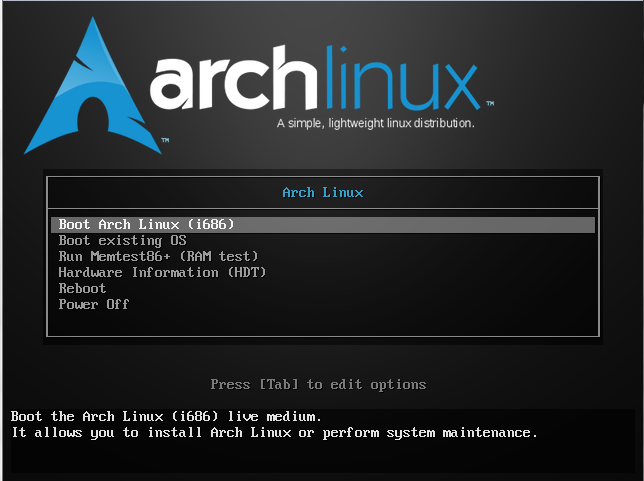
Arch Linux Version Selection
You can select the installation you want to do. In our case we want to install the i686 which is the 32 bits version of Arch Linux.
if you want to install a 64 bits version of ArchLinux you will have to select x86_64
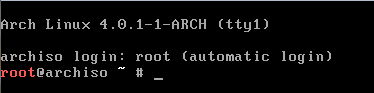
This will bring you to the basic command prompt. This prompt is the one of the installation OS which is hosted on the USB Key
Find the install drive name
Before we start installing ArchLinux we need to find the main drive that will be used to install it. Run the command.
fdisk -l
This will list all the disk you have on your machine. In my case the command returns this:
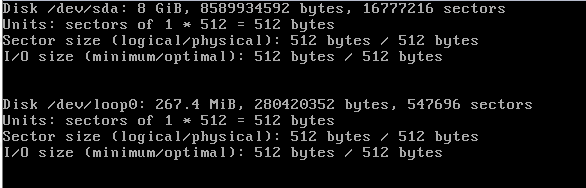
You should see something similar to that. In my case the drive on which I want to install Arch Linux is /dev/sda
Create the partition on your hard drive
We create two partitions on the drive /dev/sda.
Remark: Creating two partitions is the minimum you have to do. However you will find in the literature that often there can be more partitions. However in our case two are enough.
- Swap partition : half of the size of your memory
- Data partition : We will create a single partition for all the rest. We won’t try to be clever and create different partition for different folder.
Run the command below to start the partition manager :
cfdisk /dev/sda
Format the main partition and mount the new formatted disk
We need to format the new data partition as ext4 which is the current standard Linux file system type. Following this step we will have to mount the new formatted partition in the current Archlinux installation boot OS to be able to download and install the base Archlinux packages later on.
mkfs.ext4 /dev/sda2
mount /dev/sda2 /mnt
Initialize the Swap partition
The Swap partition is initialized using the following simple command. The first one initializes the swap then the second enables it.
mkswap /dev/sda1
swapon /dev/sda1
Enable the network
This can be different depending on if you are using a wired or wireless network. I will explain below for wireless (note: wired network should be enabled by default). The base install image comes with a utility that helps you find and set up your wifi connection. Run the command below to set up your wifi connection.
wifi-menu
Download all the Archlinux base packages
Now that we have the network setup completed we can download from the Internet all the base and base-devel packages of Archlinux to the /mnt mount point. We do that by running the following command.
pacstrap /mnt base base-devel
Start ArchLinux partition
Now that we have downloaded all the packages required for the base image of Archlinux it’s time to start that new partition. Archlinux comes with a specific tool that starts the archlinux session as root. When you run the command you will see the command prompt change.
arch-chroot /mnt
Change the root password
First things first… securing the newly installed OS. For that we need to change the current password of the root account to which we are connecting. Run the following command and enter the new root password you want.
passwd
Enable locale settings
The computer locale settings are defined in the file /etc/locale.gen. This file contains all the locales predefined. We just have to uncomment the one we want to enable. You can do that using ‘vi’ or ‘nano’. In our case we wil use nano here. When we finish editing the file /8/etc/locale.gen* we will run the command lcoale-gen to generate the file we need.
nano /etc/locale.gen
locale-gen
Set the time zone
On Linux all the time zone info is defined in /usr/share/zoneinf. We will have to create a link between the time zone we want and the file /etc/localtime. The first command lists the time zone info. Your time zone can be located in another child folder. For example Paris is under the folder Europe. The second command creates the link between the time zone we want and the configuration file that Linux is reading this information from.
ls /usr/share/zoneinfo -ali
ln -s /usr/share/zoneinfo/Hongkong /etc/localtime
Give a name to the computer
We have to set the file /etc/hostna,e to contain the name of the current computer (think of a fun name!). The best way to do that is to print to the file the name you choose using output redirection, like this:
echo archlinuxEeePC > /etc/hostname
Install some useful packages for wireless
As we are installing ArchLinux on a laptop it is useful to install some network tool to be able to reconnect after the reboot. The package netctl allows you to manage configuration using profiles. We are also going to install a dialog to allow the command wifi-menu that we used earlier to work.
pacman -S wpa_supplicant netctl dialog
Installing and Setting Grub boot loader
We’re almost done… :-)
We now have to install and set up the bootloader. The most common used today is Grub. The bootloader allows us to choose the OS we want to boot and take all the driver initialize. We have to run several commands to acheive the following:
- Download the Grub package from internet.
- Install Grub as bootloader on the drive /dev/sda
- Create the default configuration of Grub. This is the default one. We will do another article how to customize that.
Here’s the commands to run:
pacman -S grub-bios
grub-install /dev/sda
mkinitcpio -p linux
grub-mkconfig -o /boot/grub/grub.cfg
Final steps. unmount and reboot
Here we are, the last step… We have to run the below command to exit the current instance of ArchLinux we just set up and return to the boot OS. Following that we will create the static information about the file system and unmount the file system and finally reboot.
exit
genfstab /mnt >> /mnt/etc/fstab
umount /mnt
shutdown -r
Wrapping
Congratulations! We now have a freshly installed Archlinux base installation. In the upcoming articles we will look at the following post installation steps:
- User and security
- Network confuguration
- basic service and toll setup
- Windows Manager and windows windows
- XMonad configuration
- vi advance setup
- Development environment setup for .Net/F#